QuickGuide
See Installation for details on how to install and run this tool.
Once you load the tool you should see the interface.
Categories
The MayaShaderLibrary works by creating Categories, inside each category you will save/load your shaders.
Categories will be created and listed, once you select one, the shaders inside that category will be displayed.
Note
To remove a category from the ui, click on open category folder and delete the folder from disk.
Shaders
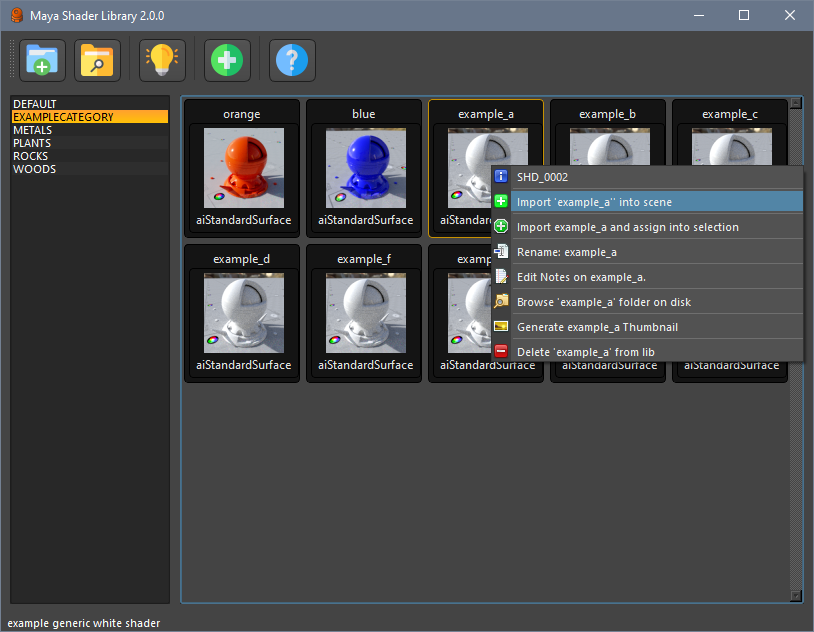
Save shaders to disk by selecting a mesh in your scene and press the ‘add shader’ button, once saved the shader should appear in the category.
To load a shader, right click on the shader icon and select load shader, the shader will be added to the hypershade.
If you choose load and assign, the shader will be imported and assigned to your current selected object if possible.
Shader Notes
For adding or editing comments on a shader, use context menu, and select ‘edit notes’. Notes are shown on the information bar when a shader is selected.
Note
The shaders are stored on this location: installDirectory\MayaShaderLibrary\library\shaders
Thumbnails
Note
The maya file used for render the thumbnail image is located on this location: installDirectory\MayaShaderLibrary\library\scene\thumbnail_scene.ma You can edit this file to change the light rig or the render settings.